

Eagle
- Mohamed Khaled

- Oct 11, 2018
- 1 min read
Updated: Oct 14, 2018
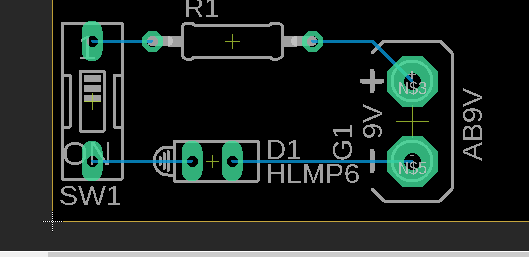
This task is to get familiar with the software and get to know how to use it and a to create a LED circuit design and board design.

How To design on Eagle?
1. open Eagle.

2. Click on File then New then click Schematic, it will open a new widow.


3. Now we start adding the component of the circuit, by Clicking Ctrl + A or writhing add, it will open a new widows to search for the component.


4. Write component name (such as battery, LED, switch), or you can write it serial number, after choosing the component you need click OK and place it in the widow.


5. the components:
a. Battery.
b. Switch.
c. LED.
d. Resistor.

6. Now you will begin to add points to connect the wire to, by clicking Ctrl + J, and add points to the terminals of the component.

7. Now you start to connect the circuit together with Wires by clicking ctrl + W.


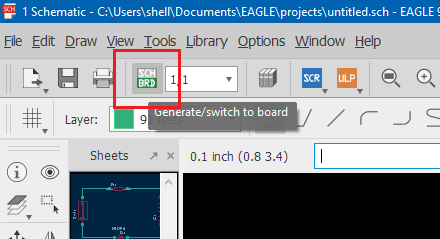
8. Now you click Generate/Switch to Board, it will open a new windows to design your board.


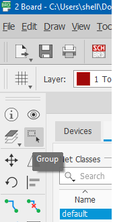
9. click on Group on the toolbar in the left and select your component then click ctrl + M to move them and click Move: group and move inside the board.


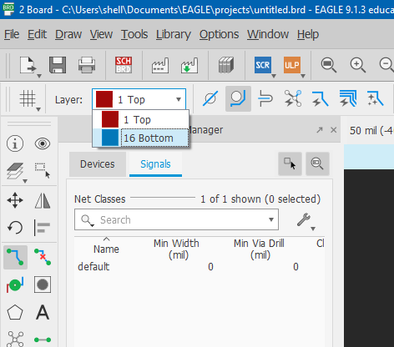
10. Click ctrl + M and start moving the component to make you design make sure that the lines does not overlap.


11. Click ctrl + R to draw the lines of the wires and choose top of the board, then connect the component.


12. now save your design.
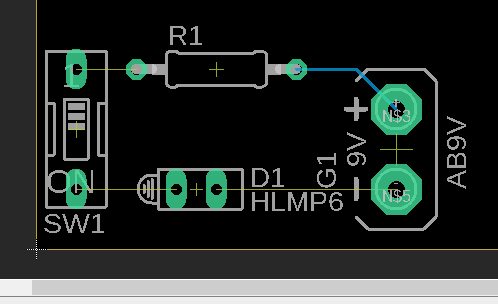
Final Result:


link:


Comments