

3D design of a Door Hinge
- Mohamed Khaled

- Sep 24, 2018
- 4 min read
Updated: Oct 11, 2018
The test is to make a 3D model contain of two or more parts getting together and have a movement and we have a bonce point to make a simulation for the movement, we are going to work on Fusion 360 as for the software to create the 3D model, for me it is the first time to use a designing tool to draw, but wit was a hell of experience, I learned a lot from it, and it was fun along the way.
How to make your first design using Autodesk Fusion 360?
It starts with an idea mine was a Door Hinge, it has all the requirement they need more than two parts connected together and moving, so i started sketching the design on paper first and decide the dimensions needed.


By doing this i started to have a documented design that i can start drawing it on Autodesk (Fusion 360).
1. First we open Autodesk Fusion 360

This is the starting page it open you a new project automatically.
2. We will chose the Rectangle > two points tool in the SKETCH category in the toolbar, or you can click R on the key

3. We will draw a rectangle by clicking on two points in the Sketch sheet (the rectangle till be in a blue color line).

4. Then click Right click on the mouse, and chose Extrude.

5. Write the depth you want then click enter to see the result, i wrote 5 mm.


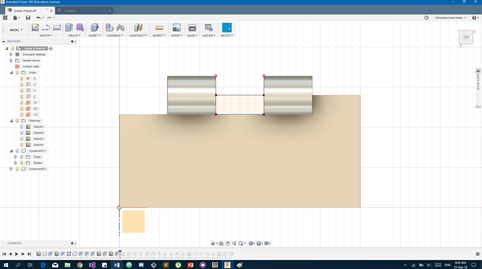
6. We will rotate the rectangle and select the side of it to draw two circles inside each other at the edge of the rectangle to create the joint (we will draw the circle by click on SKETCH in the toolbar then chose Circle then Center Diameter Circle or the short cut click C on the keyboard).


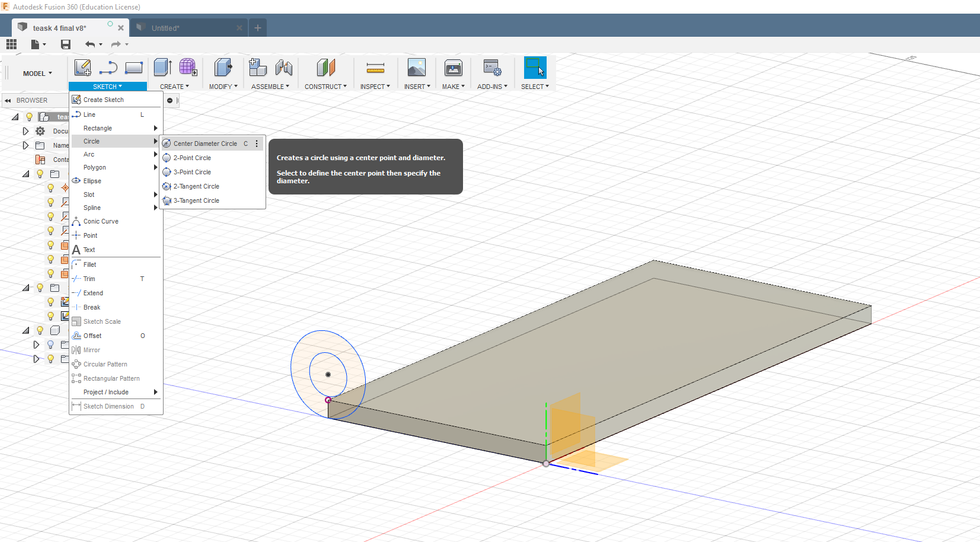
7. We will Extrude the circular sketch to make a joint , i extruded it by 30 mm.


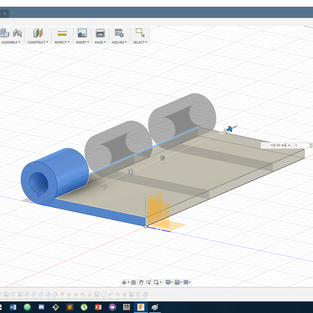
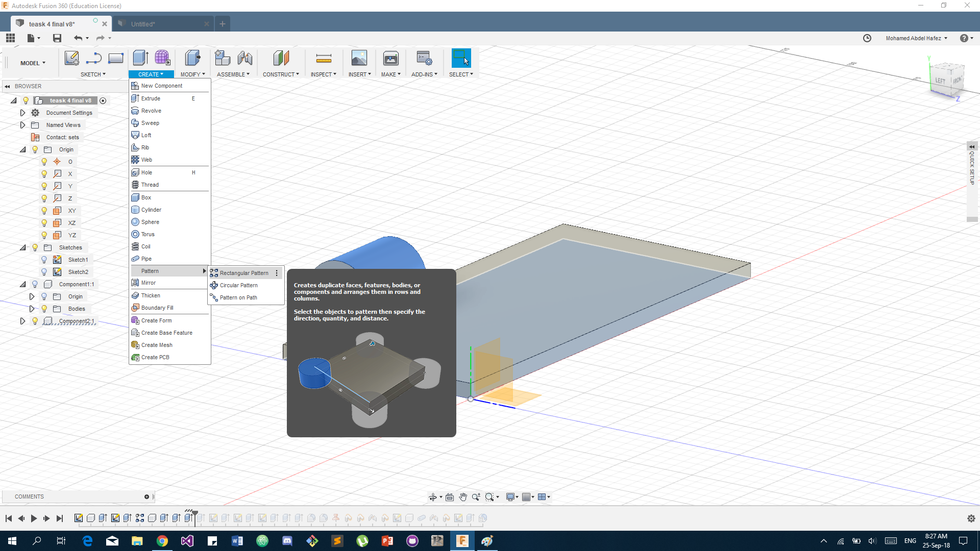
8. Then now we want to make another one so we will make a copy of it, by clicking Create in the toolbar then chose Pattern then Rectangular Pattern, then we select the object to make another copy of it and select the Direction needed, we write the Distance you want the new patterns to be in or you can Drag the object (I wrote 120 mm), then click Enter or OK


9. By doing all the above you have completed 95% of the first part, now we will do the other one.
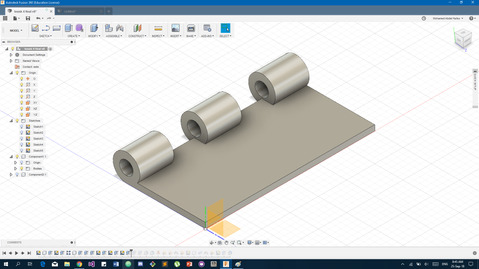
10. By using the same sketch of the first one we will make the other part, first we click on the lambs in the left side in the tree to hide the first design but keep the sketch, then we will Extrude the rectangle again by 5 mm.

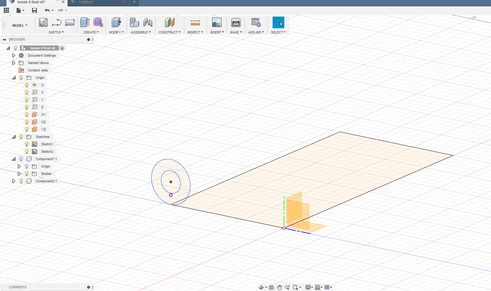


11. Also the circles we will make Extrude to them but will change the Setting of the Start point and chose Offset Plain and write the offset (I wrote 30 mm), and write the Distance of the extruding then click Enter.


12. we will make a copy of it by the Rectangular Pattern, make the Distance 60 mm and the
Quantity 2 .


13. Now we will make some space for the joints to rotate around, we will Draw a Rectangle on the side of the 2nd object and Extrude -30 mm from it.


14. and well do the same to the other parts.


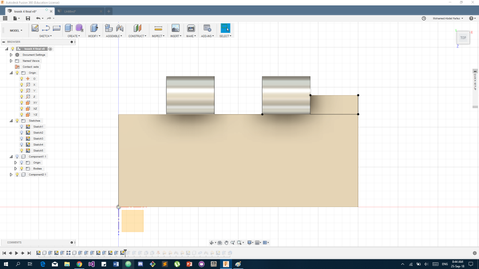


The result:

15. We will hide this object and show the first one, and start Extrude some parts for the rotation.


16. Now we will make the Edges smother for Design sake, by clicking MODIFY from the toolbar then chose Filled, and start selecting all the edges, and write a Radios of 2 mm.


17. Do the same to the 2nd object.

18. Now show the both of them and move them apart.


19. Now we want to create a joint to connect the both of them and make them move, by clicking Joint in ASSEMBLE in the toolbox and start selecting the joint parts that is going to be joint together, then we will flip the 2nd object want then move it in the right direction to satisfy our need.


The result:

20. Now you can select one of them and move it and see the magic happens.
21. Hide the two object and start a new sketch to Draw another one.
22.We will Draw a line 15 mm in length, then click Create then chose Pipe then chose Radios of 1.5 mm then click OK.


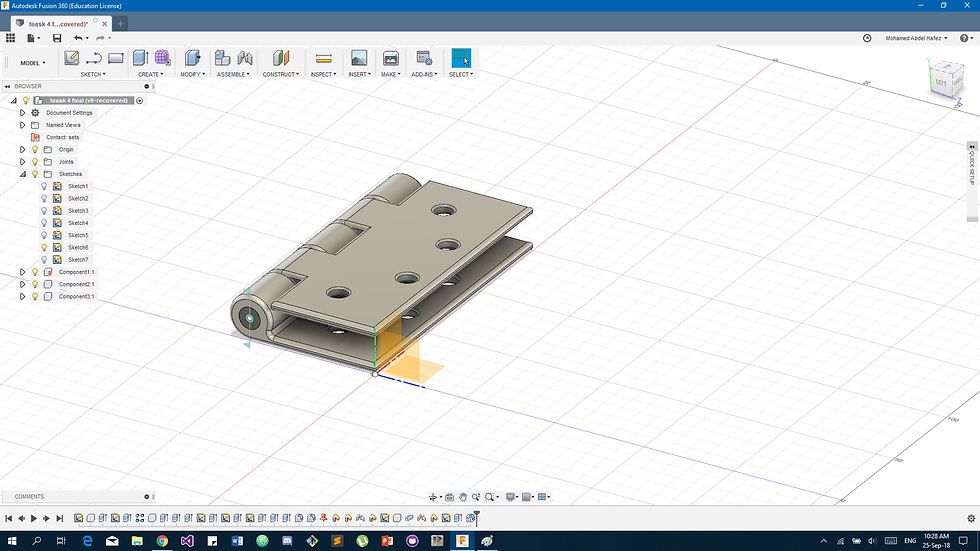
23. Now we will make joint between the third object to the rest and make it rotations.

24. I put a limit for the angle of rotation to open 180 degree only.
25. i put holes in it for designing, and the final result:
Files Link :https://drive.google.com/open?id=1a26h2q-a1YtTkVc7DHDZB7QSK4uG7cG2
A hinge is a mechanical bearing that connects two solid objects, typically allowing only a limited angle of rotation between them. Two objects connected by an ideal hinge rotate relative to each other about a fixed axis of rotation: all other translations or rotations being prevented, and thus a hinge has one degree of freedom. Hinges may be made of flexible material or of moving components. In biology, many joints function as hinges like the elbow joint.
Link:
https://drive.google.com/open?id=1a26h2q-a1YtTkVc7DHDZB7QSK4uG7cG2


Comments